Add tabs to a form (or panel)
This exercise describes how to add items to a TabControl:
- Click and drag a TabControl from the Toolbox to the Design Sheet:
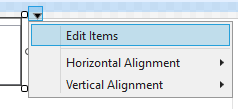
- To add TabControlItems to the TabControl, select Edit Items from the control drop-down menu:
- Save your changes and click Run to run the form. The TabItems you have added are shown as tabs on the TabControl:

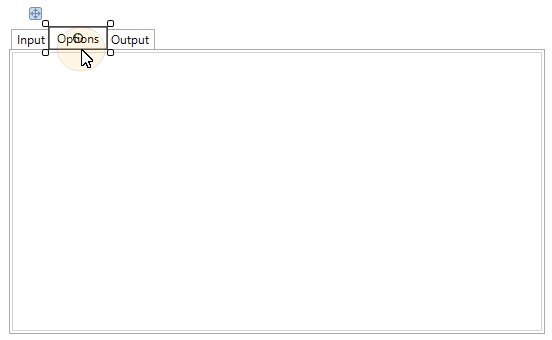
Resize
Click and drag the corners of the control to resize the control.
Reposition
Click and drag the handle (top-left) to reposition the control.
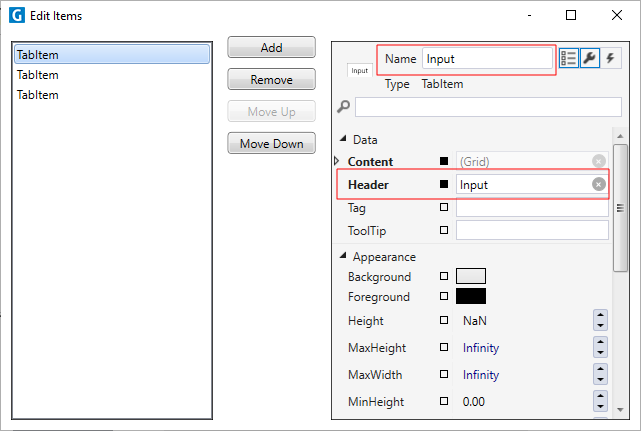
In the Edit Items dialog, with TabControl selected in the left-hand pane, click the Add button to add as many TabItems as required:
In the Properties pane on the right-hand side, use the Header property to label each tab (for easy identification you can also set the Name of the TabItem to match the Header).
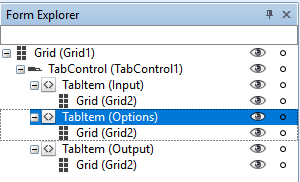
Close the Edit Items dialog. The Form Explorer will look like this:
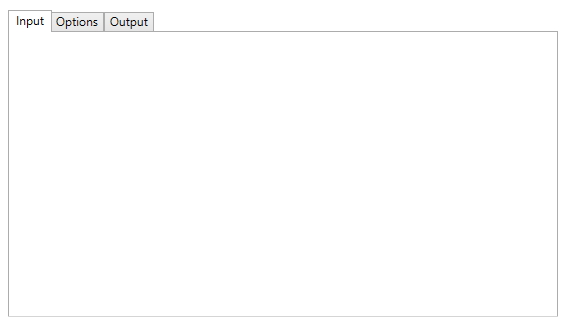
Each page of the TabControl is empty.
When you add TabControlItems, a Grid “container” is added for each Item. A “container” is simply a control that contains other controls such as a DataGrid, ListBox, Button, etc.
Close the preview of the form.
To add controls to a TabItem:
- Select the TabItem you want to add a control to:
- Click and drag a control from the Toolbox to the TabControl:

You can continue to add controls and design the layout of each page of the TabControl in the same way you design the layout of the form.