Create a Ring Plot
To create a Ring plot:
- Click the Ring Plot button on the Ring Design toolbar.

The way that plotting works in Ring Design is a little different to the other Vizex display modes. A specific type of plot, with its own substitutions, is generated. Hence, you should ONLY use the Ring Plot button on the Ring Design toolbar to generate a Ring plot file.
If no rings are selected, then the Selection Assistant will prompt you to select the rings you want to plot before the Generate Plot File form is opened.
-
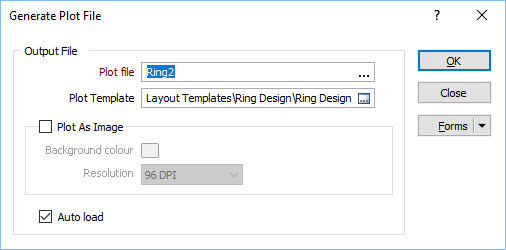
In the Generate Plot File form, you can choose to generate a plot file or generate an image.
-
Click the OK button to generate the Ring plot (or image).
The data contained in each frame of the plot layout is extracted from the Ring database and is stored in a temporary (.DAT) data file in the \Ring DesignDATfiles subfolder of the current project folder.
To avoid naming conflicts and the possibility of files being overwritten when ring names commonly occur across different ring design layers, the Ring Database File (RDF) Name is added as a prefix to the Ring Name and the Plot File Name.
The temporary files associated with a Ring plot file are automatically deleted whenever you delete the Ring plot file.
- If multiple rings have been selected, the Generate Plot File dialog will remain open and the Plot file name will be incremented for the next ring. Click OK to generate subsequent plots (or Cancel).
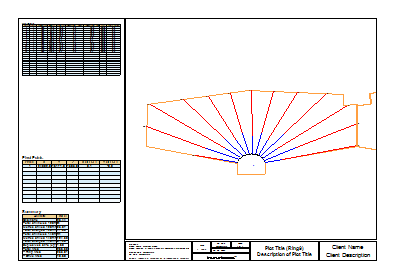
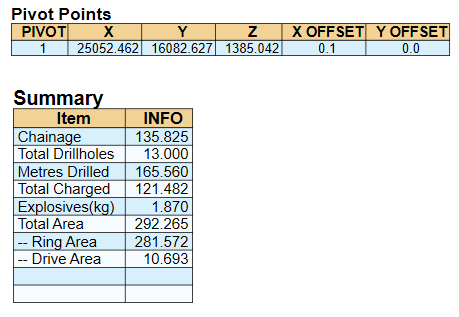
The details of each ring and pivot points are shown. The number of holes, the total length of the drilled holes, and the amount charged for individual diameters are shown in a Ring Plot Summary.
Note: From Micromine 20.5 onwards, if a Ring Design consists of both planned and as-drilled drillholes, only the as-drilled holes are included in a Ring Plot.