Fence Image from Drillholes
Select File | Image | Fence Image from Drillholes to select an image to be draped onto multiple, adjacent vertical planes, as defined by pairs of neighbouring holes.
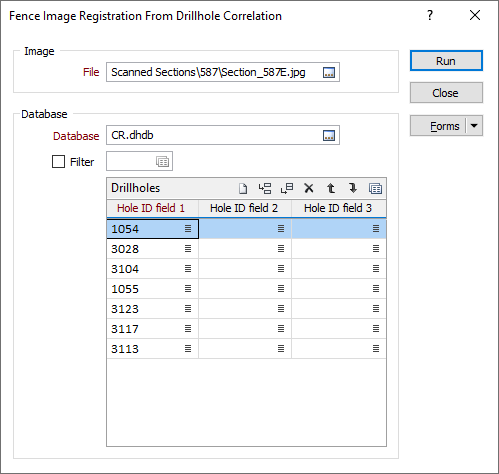
Image
Double-click (F3 or click on the Select icon) to select the name of the image you want to register.
Drillhole Database
Load an existing form set, or alternatively, double-click (or click on the Select icon) to select from a list of databases in the current project.
Select the Filter check box if you want to apply a filter to the database. Enter a filter number in the adjacent response. Double click (F3) to see a list of existing filters. Right click (F4) to open the dialog box where you can create a new filter.
Drillholes
Select the required Hole IDs in the correct order for the intended ‘fence line’.
To populate the list, insert or append a row to the grid and click on the List icon to the right of the Hole ID fields
Depending on the database, up to three hole fields may be used to uniquely identify each hole. You can use the buttons on the toolbar (or use the right-click menu) to manipulate the rows in the list.
|
|
Click to Clear all rows. |
|
|
Click to Insert a row above the selected row or Append a row to the end of the list. |
|
|
Click to Delete the selected rows. |
|
|
Click to Move Up or Move Down the selected rows. |
|
|
Click the Forms button to load a hole list saved as a form set (for example the hole list might have been created by the Interactive Drillhole Fence tool, and then saved as a form). |


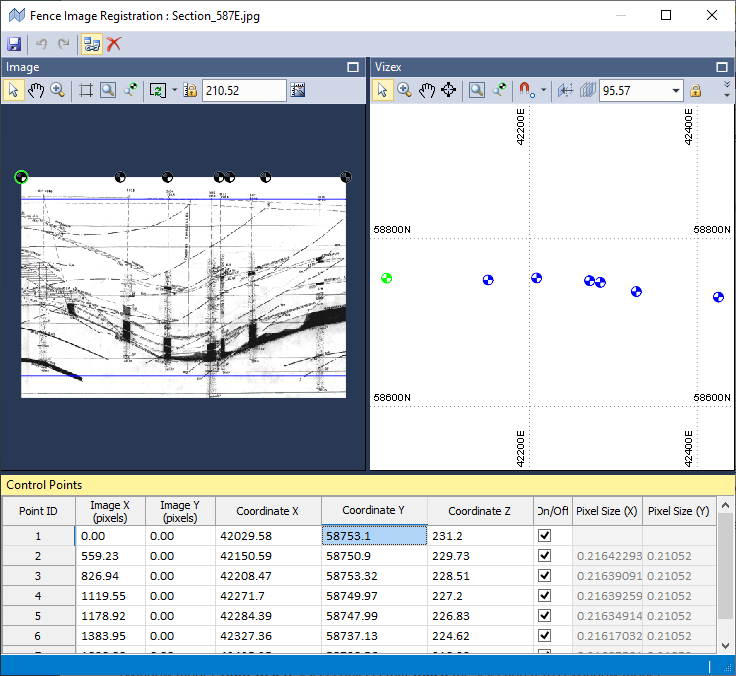
Run
Click Run. The Fence Image Registration window is opened with defined control points based upon the collars of the holes you have selected.
Forms
Click the Forms button to select and open a saved form set, or if a form set has been loaded, save the current form set.
By design the Forms button is not available for loaded Vizex layers (i.e. when opening the form set properties of a layer in the Display Pane). In Vizex, the Forms button is only available for new forms opened via the Display | Vizex menu (or by double-clicking on a form type node in the Vizex Forms Pane).
Save and Save As
Click the Save button to save the changes you have made to the form set. Click Save As to save your changes as a new form set. Save As will default to the first available form set number.
Reset
Click Clear to clear the form of all values and reset the form to its default state. In the case of tabbed forms, set the first tab as the active tab.
Undo and Redo
Click Undo (CTRL + Z) to undo recent changes in the form. After an Undo, click Redo (CTRL + Y) to restore the last change that was undone.
Collapse
Collapse (roll-up) the form to preview the results of an operation in Vizex, or obtain input values from Vizex, the Property Window, the File Editor, or the Plot Editor.