Tie-lines

|
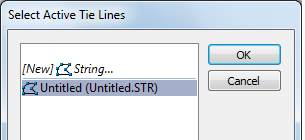
Tie-lines are created and saved to a String file which is loaded as a separate display layer. You can select an active tie-lines layer at e any time using the drop-down menu alongside the New Tie-lines button.
When you select the Tie-line button, Snapping to Point is turned on and the tie-lines you create are highlighted in a tie-line colour.
|
Once a tie-line has been added to the display, it can be manipulated just like any other string object.
For overview information, refer to the Using tie-lines to resolve inconsistent triangulation topic.