Data Views
A Data View is a customised view of your data. Data Views are Data View Property Editor by an administrator in the Configuration Manager.
When data views are added to a profile, they provide a user interface for data browsing, data entry and data validation.

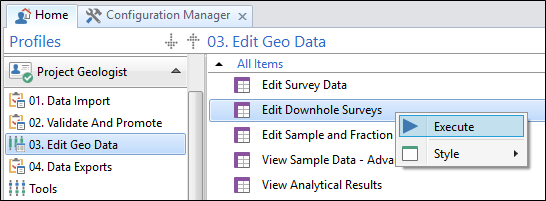
Execute
To execute a data view, either double-click on the data view object, or select the data view object and select Execute from either the Ribbon or right-click menu.
Use the options provided on the main menu and the toolbar, together with the Notebook Navigation to navigate and manipulate the records displayed within the active notebook frames.
The following options are available on the menu bar of the data view:

Edit
To insert, copy, paste, delete, and initialise rows in a data grid, right-click in the row selection column to the far left of the data grid and then select an option from the Edit Menu .
Search
Use the Find and Replace options on the Search menu to find specific values or strings in a data grid.
Filter
A filter is used to limit a dataset to those rows that satisfy specific selection criteria. The following filter sub-menu options are provided:
Select the Filter on selection option to filter the data view based on the value contained in the selected field. Only those rows with matching field values will be displayed.
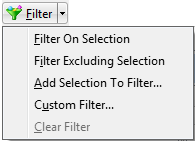
Select the Filter excluding selection option to filter the data view based on values other than the value contained in the selected field. Rows with a matching value in the selected field will be excluded from the dataset.
Select the Add Selection to Filter or the Custom Filter option, to use the Filter Options to manually define your filter parameters.
Select the Clear Filter option to remove the filter currently applied to the selected column or field.
Refer to the Filter Examples topic for more information about filter syntax. You can also apply a text filter to a lookup list. See: List of Values: Text Filter
Sort
Use the Sort menu on the data view toolbar to sort the current column in ascending or descending order.
A sort can be defined based upon the values in one field, or be based upon the values in multiple fields. You can sort by multiple columns by selecting one of the Add Column to Sort options.
Select the Custom Sort option to select the columns you want to sort on in the Sort Builder .
Views
Use the options on the View menu to hide and show columns, tile the notebooks in the data view, or refresh the datasets in the data view.
Tools
Use the options on the Tools menu to export data in various formats, generate Statistics and run custom tools and validation. See: Export Data
Help
Click the Help button to invoke the context sensitive online help on data views.
Navigation
The navigation buttons are used to navigate the records displayed within the active notebook frames. See Notebook Navigation .
Add Row
The Add Row button is used to add a blank row to the end of the displayed Site table. You can enter a new record to the table in the row.
Insert Row
The Insert Row button is used to add a new row after the current cursor position in the displayed Site table. You can enter a new record in the blank row.
Delete Row
Click the Delete Row button to delete the selected row in the displayed Site table.
Save Row Changes
The Save Row Changes button is used to save any changes made to the Site table, such as a new record inserted using Add Row.
Cancel Row Changes
The Cancel Row Changes button will undo any changes you have made to a row in the Site table.
Refresh
The Refresh button will update the current view with the latest data.
Best Fit
The Best Fit button applies the 'best fit' to the width of the selected column in the data view according to the information it contains.
Best Fit (All Columns)
The Best Fit (All Columns) button applies the 'best fit' to the width of all the columns in the data view according to the information they contain.