Sampling: Data Entry Best Practice
We recommend using the following steps to enter your sampling data.
- In the Collar tab, select the SiteID that you wish to create sampling for.
- Click on the Sample tab. Create the first sample record by clicking on Insert Record:
- Run INSERT ORIG using Execute Many to create your first run of routine samples.
- Then run INSERT STD or DUP using Execute Once to create your first QAQC sample.
- Then alternate between steps 3 & 4 to populate the rest of the hole. Use Execute Until EOH to populate the last stretch of samples for your hole (so that the EOH sample depth will be auto-populated).
- Enter the SampleID in the first row and click Increment Many:
![]()
Make sure all the fields are populated correctly, because they are going to be copied down through the rest of the hole. Note that we are leaving Sample ID null for now.
![]()
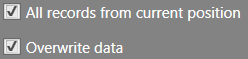
If you wish to populate all Sample IDs down to the last record, then make sure the following are ticked: