Before you create a ring you will need to select an existing drive in the display, or Add Drives to the display.
If no drive is selected when you select this option, the Selection Assistant will prompt you to select (and if necessary add) the drive you want to create a ring for.
Once a drive has been selected:
- Click the Create Ring tool on the Ring Design toolbar.

Note: When Create Ring mode is active an existing ring cannot be selected.
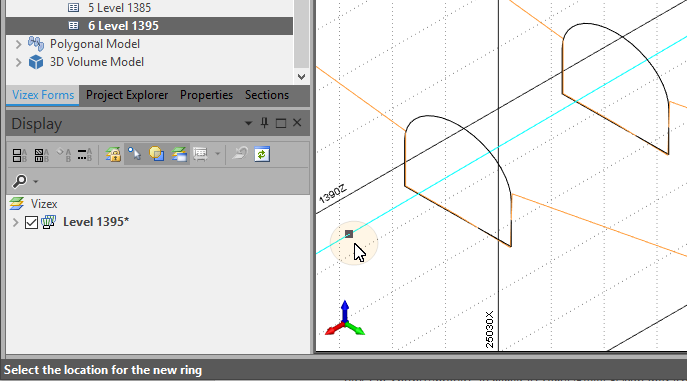
- A message on the status bar and above the ring display will prompt you to select the location of the new ring by snapping to a point on the drive string:
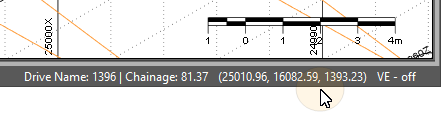
The coordinates of the point position are also shown on the status bar:
Tip: If the drive wireframe is obscuring your view of the drive string, you can turn off the display of the wireframe object (deselect the check box) in the Display Pane.
After snapping to a point on the drive string, an empty ring object is created, a wireframe slice (the drive boundary) is displayed on the drive string, and a properties window is displayed.
- If necessary, you can edit the Ring
Name, Dump Angle, Chainage and Azimuth.
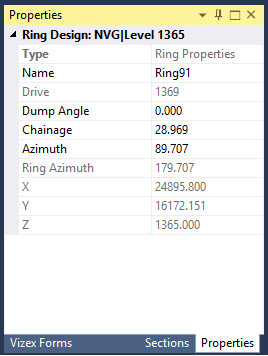
Ring Azimuth is calculated as [Azimuth + 90] where Azimuth is the azimuth of the drive at the location of the ring. The Ring Azimuth property is not editable, however, if the value of Azimuth is changed, the ring will be redrawn perpendicular to the new Azimuth value.
The Dump Angle is the angle of the inclination of the ring plane, and is limited to a maximum/minimum angle of +/- 80 degrees.
Chainage is the distance between the start of the drive and the point digitised as the ring location. (The start of the drive is determined by the direction of the string).
Note: A ring is EMPTY until a ring boundary has been defined.