Working with multiple Vizex windows and instances
In Vizex, you can open multiple windows in the same Vizex instance, and open multiple Vizex instances in the same Save and load a session.
To open an instance of Vizex:

|
Click the Vizex button on the Main toolbar or select View | New Vizex Instance. |

|
To open an additional Vizex window:

|
Click the Add Window button on the Main toolbar (or alongside any open Vizex tab) to display data from the same Vizex instance in a new window. |
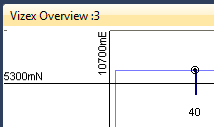
When you open multiple windows (including Overview windows) for a session, a colon plus a numeric suffix :n is used to make the name of each window unique. This makes it easier to differentiate between multiple views of your data. If a second window is opened, for example, the windows will be named: Vizex:1 and Vizex:2.
| Before | After |

|
|
You can tile tabbed windows in the workspace by right-clicking the tab in the workspace and selecting either New horizontal tab group or New vertical tab group.

Working in multiple Vizex instances
You are not restricted to working in just one instance of Vizex, or in one active layer.
For example, you might be working on a new triangulation in Vizex and want to edit the outlines that will be used later to assign grades.
|
|
To open a new instance of Vizex, click the Vizex button on the Main toolbar (or select View | New Vizex Instance). |
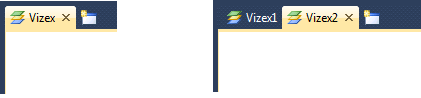
When you open more than one instance of Vizex, a numeric suffix n is used to make the name of each subsequent instance unique. This makes it easier to differentiate between multiple Vizex instances. If a second instance is opened, for example, the instances will be named: Vizex1 and Vizex2.
| Before | After |
|
|
Thus, in a situation where you have multiple Vizex instances and multiple windows open in each instance, it is easy to identify which windows belong to which instance: Vizex1:1, Vizex1:2, Vizex2:1, Vizex2:2 etc.

The naming scheme applies equally to Overview windows:

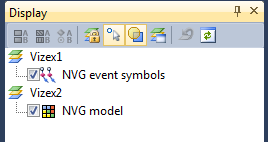
In the Display Pane you can also see which layers belong to which instance:
Instance
Renaming Vizex instancesYou can rename a Vizex instance in the Display Pane by right-clicking on the Instance name and selecting Rename from the right-click menu. Alternatively, select the name and press F2.

Renaming a Vizex instance has no effect on the default naming convention (and suffix) used to make subsequent instances unique. So for example, if you have instances Vizex1 and Vizex2 and rename instance Vizex2 as (say) View_SE, when a subsequent instance is added it will still be assigned the default name Vizex3.
Working in other windows
You are not restricted to only displaying your data spatially. For Micromine data types, when an object is selected, you can right-click and select the Open Input File menu option for the current display layer.
You can also use the File | Open menu option to open a file while you are working in Vizex. The editor window will be opened as a new tabbed page in the workspace.
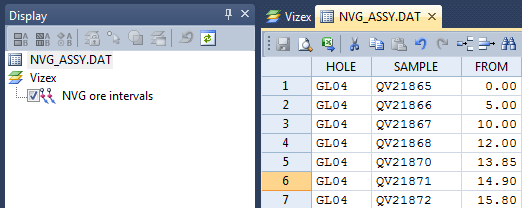
The same file can be edited concurrently in both the File Editor and in the Vizex display. Changes to the files are updated in each view dynamically.
When the last editable view of a file is closed, you will be prompted to save your changes. Alternatively, you can use the Save button on the main toolbar (or File | Save) to save your changes at any time.
The layout of windows and toolbars that you have opened, resized and repositioned, can be saved as a layout. See: Saving and loading a window layout
You can also save multiple Vizex views as part of a Vizex Save and load a session.