Sections Pane

|
Select Window | Sections (or toggle the Section Pane button on the main toolbar) to: |
- Change the orientation and the extent of the display
Double-click on the Display Limits node to define Display Limits and apply them to the display.

Alternatively, display limits which have previously been saved as form sets, are available for selection under the Display Limits node.
You can right-click (or double-click) on the name of a display limits form set to apply those limits to the display.
- Define and retrieve sets of predefined sections and plans
Standard Sections
Standard sections can be selected and displayed. This saves a lot of time navigating the display.
Section control files
You can also load the sections defined in a Section Control File.
A subset of the tools on the Section Control File Toolbar are provided at the top of the Sections Window. You can create a new section control file, open an existing section control file, edit a section control file selected in the Sections Window, or update a named section selected in the Sections Window.
|
|
Click the Create Section Control File button to create a new section control file. The file you create is saved to a SECTIONS sub-folder underneath the current project folder and a node for the opened section control file is added to the Sections Window. |
|
|
Click the Open Section Control File button to open an existing section control file. A node for the section control file is added to the Sections Window. |
|
|
Click the Edit Section Control File button to edit the selected section control file in the File Editor. |
|
|
Click the Close Section Control File button to close the section control file and remove named sections from the list. Selecting this option will not delete the underlying data file. |
|
|
Click the Create Named Section button to add a section to the current section control file. |


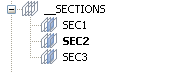
To move from section to section
- Double-click on the sections listed under the node of a section control file. When a section is current, it is shown as bold in the list of sections, and the section view is applied to the Vizex display.
- Alternatively, use the Previous Section and Next Section buttons on the Sections Toolbar to move sequentially through the sections defined in the section control file.
The Sections Toolbar allows you to define further sections that can be added to the section control file.
To add a section to a control file
- Select a section control file and click the Create Named Section tool on the toolbar. Alternatively, right-click on the name of the section control file and select the Create Named Section menu option.

- Enter a name for the section and then press Enter on your keyboard.
The section is added to the end of the section control file. See 'Update a section" below.
- To save the section(s) you have added, right-click on the name of the section control file and select the Save Control File menu option.

Display a section
- Right-click (or double-click) on the name of the section and select Display to apply that section to the display.
Edit a section
- Right-click on the name of the section and select Edit to open the file for editing.

The section control file is opened in the File Editor and the section is highlighted in the file.
Delete a section
- Right-click on the name of the section and select Delete to remove that section from the section control file.

Update a section
- Double-click on the section name. When a section is current, it is shown as bold in the list of sections, and the section view is applied to the Vizex display.
- Use the tools on the Sections Toolbar to manipulate the section view.
- Right-click on the name of the section and select Update to update the named section using the current display limits.


When the section is changed using the normal Next Section/Previous Section buttons on the Sections Toolbar, the distance between the current (displayed) section and the active (selected in the control file) section is displayed.