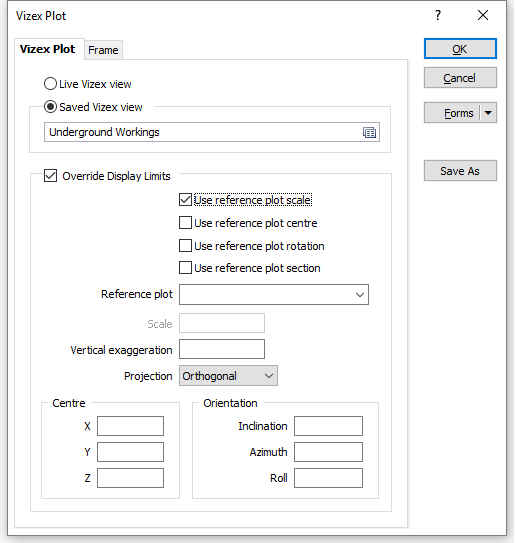
Vizex Plot Frame
Vizex plot frames are rendered directly from a live Vizex view or a saved Vizex view and (unlike regular 2D Plot frames) can be interactively rotated in 3D within a layout. Once the view is positioned as desired it can be printed as normal.
To add a new Vizex plot frame:
- Double-click on the Vizex Plot frame type in the Plot Forms pane.
- In the Vizex Plot form, select the Live Vizex view option if the view you want to plot is currently opened in Vizex. Otherwise, select the Saved Vizex view option and double-click in the input box to select the saved view.
- Select the Override Display Limits check box if you want the display limits of the plot frame to be different to that of the live or saved Vizex view.
- If you are using the plot to display a section view of your data and want to link it to a plan view, select Plan plot from the drop-down list.
- If you are using the plot to display a plan view of your data and you want to link to a section view, select Section plot from the drop-down list.
- If you are using the plot to display your data and you want to link to other data, select 2D plot from the drop-down list.
Stereo settings are not saved as part of a saved view. However, stereo settings can be saved and restored as part of a saved session. Anaglyph stereo images can only be plotted using the Live Vizex view option in the Vizex Plot frame.
Use Reference Plot Scale
Select this option to link the scale of the plot frame to the scale of a Reference Plot Frame. Otherwise, enter the X and Y scale of the plot in the Plot Definition group (see below).
Use Reference Plot Centre
Select this option to link the centre of the plot frame to the centre of a Reference Plot frame. Otherwise, enter the X and Y coordinates of the plot centre in the Plot Definition group (see below).
Use Reference Plot Rotation
Select this option to link the rotation of the plot frame to the rotation of a Reference Plot frame.
Use Reference Plot Section
Select this option to clip the view of the plot frame to the section view of a Reference Plot frame.
Reference plot
If you have selected a Use Reference Plot option, select the plot that will be used to reference the scale and/or the centre of the plot.
When you select the Use reference plot options, the scale, centre, section, and rotation of the plot will be updated whenever the scale, centre, section, and rotation of the Reference Plot frame is changed.
Scale
If you are not using the scale of a reference plot, enter the X and Y scale of the plot.
Vertical Exaggeration
To override the vertical exaggeration of the live or saved Vizex view, enter a factor which will exaggerate the vertical extent of the display.
Projection
Two cameras are available for use with the 3D display: a perspective and an orthogonal camera. Use the Projection setting to switch between them.
The Orthogonal camera, on the other hand, produces parallel projections and thus does not create a distortion with distance. Use it when it is important to get an exact idea of measurements, which would be distorted with the perspective camera.
The Perspective camera emulates the human eye, that is, objects that are further away appear smaller. This is the most commonly used camera.
Centre and Orientation
Use these settings to set the camera position and orientation.
Viewpoint X ,Y ,Z parameters are used to look at an object from a cardinal direction. These settings determine the orientation of the camera.
Inclination , Azimuth , and Roll define the orientation of the camera. Changes made to these parameters will the affect the viewpoint X, Y and Z and vice versa.
- In the Frame tab, set the general (fill, border, and margin) properties of the plot frame.
- Finally, click OK to add the Vizex Plot frame to the layout.
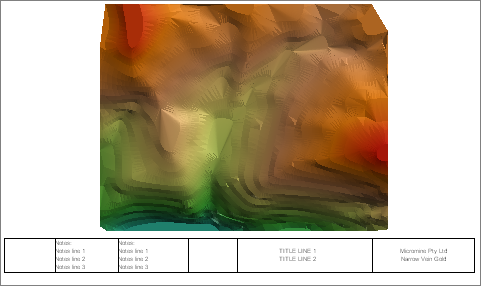
The live or the saved Vizex view you selected will be displayed inside the Vizex Plot frame.