Hatch Properties
A 2D Slice and Silhouette hatch pattern can be saved as part of the wireframe. When displaying a wireframe, select Default Hatch to use these saved hatches. This can be particularly handy when displaying a wireframe set.
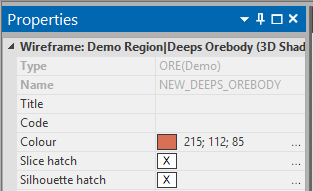
The default hatch (silhouette and slice) for any wireframe is NO FILL, with a solid, 0.20mm thick border using the wireframe colour. This default hatch is indicated by the NULL patch, in either the Property Pane (select the wireframe in Vizex) or the Wireframe Properties (right click on the Wireframe Name in any form).
|
|
If you want to revert to the default hatch, then open the Wireframe Properties dialog, click on the patch and press the DEL key (this is not supported in the Property Pane).
You can interactively change the Default Hatch (the hatch stored in the wireframe), by double clicking on the patch (to bring up the Fill Pattern dialog) and editing the hatch. When both the foreground and border colour are NULL (or foreground is NULL and the border colour is set to Use foreground), then the wireframe colour will be used for both foreground and border. In this case, the patch colour (in the Properties Pane) will be a light grey. However, in the Fill Pattern dialog itself the Sample will not be displayed and the patch in the Wireframe Properties will appear blank.
In Vizex the default hatch is honoured when Default hatch (from wireframe) is chosen as the display option.
When the display option is Simple hatch, then the default pattern can still be used by setting the fill pattern to NULL (this is done by pressing the DEL key when the patch has focus):
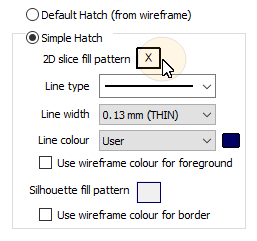
All the line (border) settings, for the displayed hatch, come from the values defined in the Simple Hatch group box.
There are several ways to define the hatch properties for a wireframe:
- Use the Wireframe | Manage | Change Hatch function.
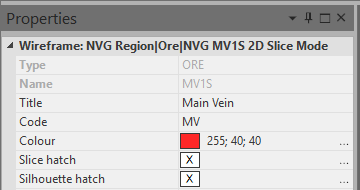
- Display the wireframe in Vizex. Then select it and open the Property Pane:
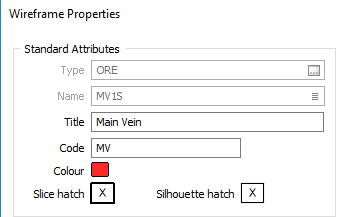
- From the Wireframe Properties dialog. The most convenient way to open this is to right-click on the Wireframe Name in any form:
|

|
If the hatch is undefined (left screenshot) the hatch reverts to NO FILL, with a solid, 0.20mm thick border using the wireframe colour. This default hatch is indicated by the NULL patch, in either the Property Pane (select the wireframe in Vizex) or the Wireframe Properties (right click on the Wireframe Name in any form):
If the hatch has previously been defined it will be shown (right screenshot). In either case the clicking on the ellipsis (or double clicking on the pattern) will enable the pattern to be edited.
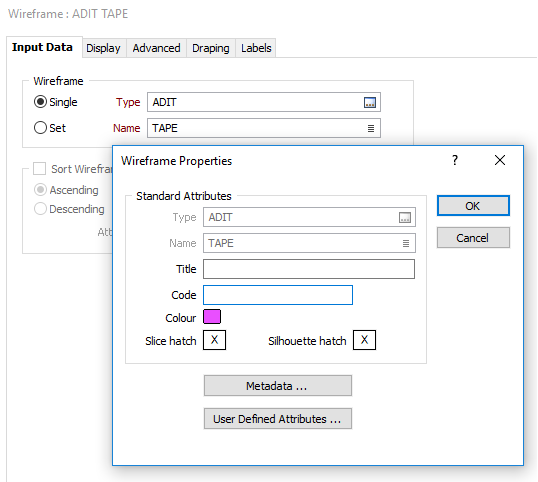
Double click on either the Slice or the Silhouette "patch" to edit the hatch pattern. Remember that if you want to revert back to the NULL hatch, then click on the patch and press the DEL key.
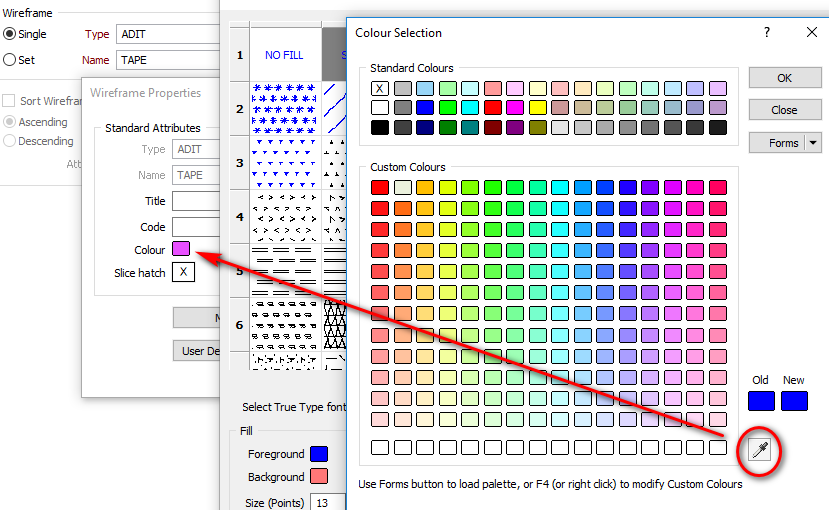
If you want any of the colours to match the wireframe colour, then move the eyedropper tool over the colour patch in the Wireframe Properties dialog (you may need to move the Hatch Properties dialog first to make the colour patch visible). Use a similar technique when editing the hatch in the Property Pane.