Modelling Parameters
On the Modelling Parameters page of the Rank Kriging form, select a Kriging mode and specify the coordinate division fields for discretisation. You can also apply a trend equation and select a transformation method.
![]()
Model
Mode
Select a (POINTS, BLOCKS or POLYGONS) Kriging mode and specify the parameters for discretisation. Discretisation is only available when BLOCKS or POLYGONS mode is selected.
Trend
When the kriging method is set to WITH TREND (also known as Universal kriging), the local mean within each search neighbourhood is modelled as a smoothly varying function of coordinates, rather than being held constant. The trend is usually modelled as a low-order polynomial func¬tion such as LINEAR (power 1), QUADRATIC (power 2), or CUBIC (power 3).
In an interpolation situation (estimating values at locations surrounded by input data), kriging with a trend offers no advantages over ordinary kriging, and is disadvantaged through having to perform additional calculations. In an extrapolation situation (estimating values at locations beyond the input data), universal kriging may offer some advantages, but only if the physics of the phenomenon suggest the most appropriate trend model. Care is needed as the estimated values will depend very heavily on the chosen model (Goovaerts, 1997, p.152).
Parameters
Select the parameter set of the associated Model type to use in the calculation. Press F4 (or right-click | Edit) to create a new set. Press F3 (or double-click) to select an existing set.
Discretisation
Click on the Discretisation button to specify the number of divisions in the East, North, and Z directions. These are integer values that control the number of discrete points to be estimated in each direction within each block (or sub-block). The values of all the discretised points are then averaged to estimate the value for the block, and the result of each block written to the output file.
For example, if you choose 4 East divisions, 4 North divisions, and 4 Z divisions, Micromine will interpolate and average a total of 64 estimates within each block. Although the estimates for a given block all share the same input data, the distance from each input sample (and thus the weight) will be slightly different for each discretised point, producing a different result for each one. The result is a more accurate estimate, but at the cost of more computing time. See: Discretisation
Set negative kriging weights to zero
Select the "Set negative kriging weights to zero" check box to adjust the negative weights so that they have no effect. However, the zero-weight samples are still included in the search neighbourhood point count, ensuring that the conditions for minimum and maximum number of samples are met.
Negative kriging weights arise when points are very close, or when distant points are masked or screened by points closer to the block being interpolated. Negative weights are generally undesirable when estimating grades, and you would typically enable Set negative kriging weights to zero in this scenario.
Alternatively, if you are using point data to model a tangible surface such as the elevation of a coal seam, including negative weights may improve the result.
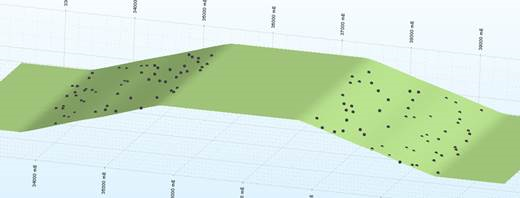
Kriging (with no negative weights):
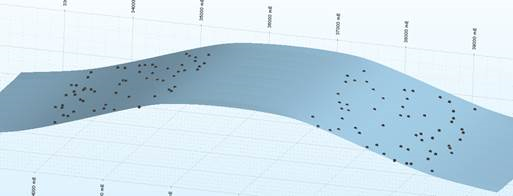
Kriging (with negative weights):
Use the verbose reporting options when setting up the Kriging runs to find out what proportion of negative weights you have with your Kriging plan. If you have many blocks with negative weights, you probably need to adjust the search/sample number parameters you have set.
Data Search
Double-click to load a form set. Alternatively, right-click in the Data Search input box to open a form where you can define the shape and direction of the search ellipsoid.
3D (Plunge, Dip, and Thick Factor) parameters will be disabled if 2D search mode is selected in the Data Search form.
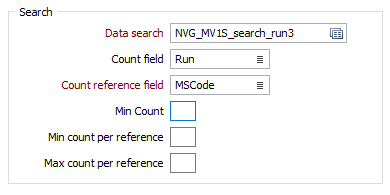
Count field
Enter the name of a new field that will be used to store a Count of the number of values (in the nominated Count Reference field) used to calculate estimates.
Count Reference field
If you have specified a name for the Count field, then the Count Reference field input is enabled. Select a field from the sample or composite file (i.e. Hole_ID) which will be used as a reference counter.
Min Count field
Optionally, use the Min Count field to specify a minimum number of values to be applied to the calculation for each block.
Min & Max count per reference
In effect, the Min count per reference and Max count per reference values allow you to apply a filter condition. For example, you may want to ensure that, for every hole, you only count a certain number of "best" points.
- Min count per reference is useful when you want to specify that you only want holes that have a certain minimum representation in a search neighbourhood (so that points are not counted, for example, when a hole has only one point in its search neighbourhood).
- Max count per reference is useful when you want to specify that all the points found in a search neighbourhood should not come from a single hole.
Both parameters use the Count Reference field to constrain the points that are selected by the grade interpolation process.
FOR EXAMPLE:
If Min count per reference = 2, Max count per reference = 6, Maximum points per sector = 8, and the "Count reference field" = HOLE_ID, then, for each search neighbourhood we want to find points to base our calculations on:
The process will look at that search neighbourhood and only count points from holes where at least 2 points are present, only take the 6 "best points", and take a total of 8 points per sector (those 8 can be from any holes).
Note that if the Maximum points per sector is left blank, the maximum value will default to 150. If you want to allow for more points you need to explicitly enter a larger upper limit. The higher the upper limit, the slower the process will be.