Columns
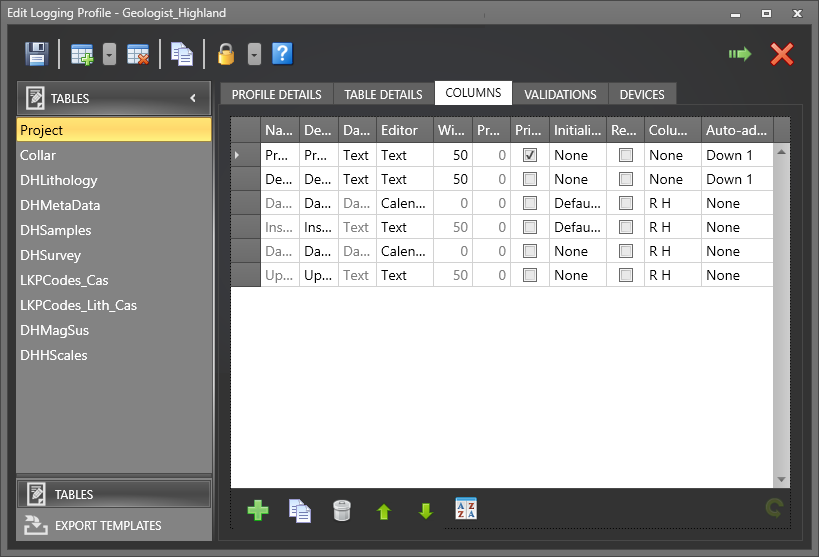
On the COLUMNS page of the Edit Logging Profile screen you can add a column, clone a column, delete a column, set the navigation order, and change the display order, of the columns for the table currently selected in the navigation pane.
| Option | Description |
|---|---|

|
Add a Column to the current table (CTRL + I) |

|
Clone the selected column and add to the current table (CTRL + K) |

|
Delete the selected columns (CTRL + D) |
|
|
Move selected columns Up (ALT + Up) |
|
|
Move selected columns Down (ALT + Down) |

|
Use the Sort Priority button to add one or more columns to define an Ascending or Descending sort order. You can use the arrows on the toolbar to change the order of the columns in the list. See: Sort Order |
If you delete a column that contains data, the data will be lost.
Add a column
To add a column:
|
|
Click the Add button to add a new column to the current table. When you add a column you must set the following properties: |
Name
Enter a Name for the column that identifies the data values in that column.
Description
When you add a column, the Description is auto-populated from the Name of the column. The Description can then be modified, if required.
Data Type
Select a Data Type. The data type of a column will determine which further properties you can set.. See: Column Data Types
Initialisation
Depending on the data type an initial default value with which to populate the column may be specified. For example: True or False default values may be specified when initialising a field of the Yes/No data type. The stored data values are 0 (False) and 1 (True).

Editor Type
Select an Editor Type which will determine how the column can be edited. You can also select a Header Colour for the column. See: Header Colour Selection
Relationship
When a column is defined as a Relationship, select a Lookup, DropDown, or CascadeDropDownEditor Type that defines the parent-child table relationship.
Date/Time
When a column is defined as a Date/Time, the column may be edited as a Calendar input, or be Calculated automatically, or be entered as Text.
In each case, you can specify a single mask which determines these three behaviours:
- the input format when you type the date in as text – once a date part has been typed, press space to move to the next date part
- the format in which the Date/Time will be displayed in Geobank Mobile
- the format in which the date will appear as a string in the export file for the table.
Example input mask options are provided in the drop-down; however, you can define a Date/Time input mask of your own in the box provided.
In the example below, an input mask dd-MM-yyyy is defined for the LoadDate column:

See Input Masks
Other
Other properties may be set, depending on the data type of the column:
- The field width of the column. This property may be disabled for some data types.
- The decimal precision of the column. This property may be disabled for some data types.
- Initialisation. Specify whether the column should be Initialised with a Default value or None.
- Specify whether the column is a Primary key in a primary-secondary table relationship.
Delete a Column
To delete a column:
|
|
Click the Delete button (CTRL + D) to delete the selected columns. |
To protect the referential integrity of the data, if the column you are deleting is referenced by a Validation Rule, a warning is displayed:
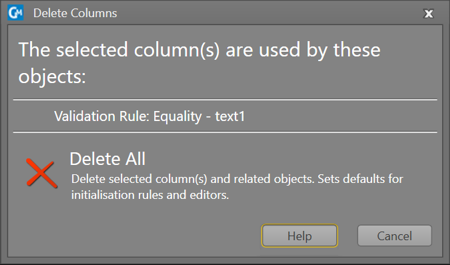
To learn more about how to enable or disable validation, see: Validation and Validations
Column Options
You can set column options at the right of each row using a drop-down menu:
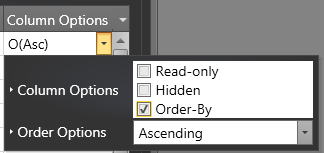
- Specify whether the column is read-only.
- Specify whether the column is hidden.
- Specify whether the column is an Order-By column that defines the sort order of the records in the table.
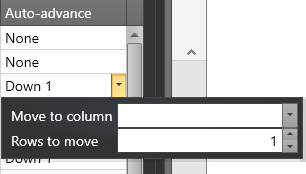
Auto-advance
You can set movement options at the far right of each row using a drop-down menu. See: Auto-advance
Clone
To clone a column:
- Select the column you want to clone.
- Click on the Clone button (CTRL + K).
- Edit the Name and other properties of the cloned column.
A clone of the column is added to the table and is named with a numbered suffix.
Save
Finally, click the Save button to save your changes and add the column to the table. When a server connection is active, a Sync icon is visible on the Save button.
| Option | Description |
|---|---|
|
|
Click the Save and Sync button to save the changes you have made to the Logging Profile and synchronise those changes back to the server database. |
|
|
Click the Save button to save the changes you have made to the Logging Profile. |
|
|
Click the Close button to close the dialog. |
|
|
Click the Help button to view the online help for this dialog. |


