Ring Design Toolbar
The Ring Design toolbar has all the tools you need to create and edit a ring design layer in Vizex.
To quickly open or close a toolbar, right-click in an empty space below the menu bar, then select a toolbar from the right-click menu. A check box is shown alongside those toolbars that are currently open.
To enable the Ring Design toolbar you will need to select the Ring Design layer as the Active Layer. Not all the buttons and tools on the toolbar will be enabled, however. This will depend on the current display mode.
The Design Ring Boundary tool, for example, will be disabled until you click on the Edit Ring button to enter Edit Ring mode. Similarly, the Add Drive, Set Drive Wireframe, and Create New Ring buttons etc. will be disabled while you are in Edit Ring mode.
|
|
Click the Load Ring Design button to create or load a ring design layer in Vizex. |
|
|
Click the Add Drive button to specify a string file and a corresponding wireframe type (*.tridb) that will be used to represent one or more drives in the Ring Design display. Each string in the nominated file will be treated as a separate drive. Typically, wireframes will have been extruded using strings in the same file. See: Add Drives |
|
|
Click the Create New Ring tool to put the display into Create Ring mode and create a new ring object, You will need to select an existing drive in the display, or add a drive to the display. See: Create a ring |
|
|
Click the Edit Ring button to put the display into Edit Ring mode. Once in edit mode, you can define a ring boundary, edit holes interactively, generate parallel or fanned holes, renumber holes, and setup for charging. |
|
|
When the display is in Edit Ring mode, you can use the Edit Previous Ring and Edit Next Ring buttons to step through and edit the previous and next rings (by chainage) on the current drive. |
|
|
When the display is in Edit Ring mode, click the Previous Ring and Next Ring buttons to view the previous and next rings while editing the current ring. See: Shadow Previous and Next Rings |
|
|
Click the Mirror Ring button to mirror the current ring so that the drill rig is facing the beginning of the drive, rather than the end. See: Mirror Ring |
|
|
Click the Copy Ring button to copy the currently selected ring to a new location on any drive. Once in Copy mode, you can select a point on any drive (including the drive the source ring is located on) as the location for a new ring. See: Copy Ring |
|
|
Click the Replicate Ring Along Drive to copy a ring along the drive multiple times. Along an individual drive, rings are often identical in terms of their ring boundary, drillhole pattern and charging setup. The Replicate a ring along the drive function allows you to save on planning time by retaining the ring boundary and the drillholes of the ring being replicated. |
|
|
Click the Delete Selected Object tool to delete the currently selected object, whether it be a drive, ring, or drillhole. See: Delete a Ring Design Object |
|
|
Click the Delete Holes from Selected tool to delete holes by selecting one or more (drive and/or ring) objects which contain the holes you want to delete. You can use this tool without necessarily entering Edit Ring mode. See: Delete Drillholes from Selected |
|
|
Click the Generate Wireframes and Grades button to generate wireframes which represent the area that will be blasted for either the current ring, or all of the rings on the selected drive. You also have the option of estimating tonnes and grades for the blasted area. See: Generate Wireframe and Grades |
|
|
When you click the Ring Boundaries (Auto) tool, 2D slices of the stope wireframes located at the position of each ring along the drive, are used to generate ring boundaries automatically. The tool is applied to selected rings along the drive, or if you have selected a drive string, all rings along the drive. See: Ring Boundaries (Auto) |

|
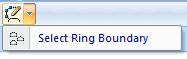
When the display is in Edit Ring mode, the Create or Edit Ring Boundary tool is enabled. When you create a ring boundary, the string is automatically closed as a single regular polygon which completely encompasses the drive. Alternatively, select the Select Ring Boundary option from the drop-down tool menu to load an existing ring boundary (previously saved as a String file). See: Select an existing ring boundary
Once you have created or loaded the string that represents the ring boundary, click the Create or Edit Ring Boundary button again to exit the restricted edit mode. If no ring boundary has been defined for the selected ring, then the Generate tool options on the toolbar will be disabled. |
|
|
When the display is in Edit Ring mode, click the Edit Drillholes button to enable interactive editing. In Edit Drillholes mode, you can interactively move or rotate drillholes by hovering the mouse over the mid-point, toe, or collar of a hole. |
|
|
When the display is in Edit Ring mode, click the Adjust Multiple Drillholes button on the Ring Design toolbar to Adjust Multiple Drillholes based on the position and orientation of a selected hole. |
|
|
When the display is in Edit Ring mode, click the Generate Drillhole Fan tool to create a "fan" of holes. |
|
|
When the display is in Edit Ring mode, click the Generate Parallel Drillholes tool to create a group of parallel holes within an extent rectangle. |
|
|
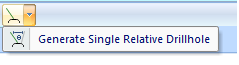
When the display is in Edit Ring mode, click the Generate Single Drillhole button to generate a single drillhole and enter hole parameters. To generate a hole with a position and orientation which is relative to another hole, select the Generate a single relative drillhole option from the drop-down tool menu.
|
|
|
When in Edit Ring mode, click the Renumber Holes button on the Ring Design toolbar to renumber the current ring. In the Renumber Holes form you can specify a start number and the direction in which the holes will be renumbered. |
|
|
It may be necessary to adjust the length of a drillhole, for example, to apply under-drilling to certain holes. When the display is in Edit Ring mode, click the Adjust Drillhole Lengths button to shorten or lengthen the holes by a specified distance. |
|
|
When the display is in Edit Ring mode, click the Interactive Charging and Stemming tool to use the mouse to interactively setup and edit charging and stemming for the holes in a ring. |
|
|
When the display is in Edit Ring mode, click the Assign Drillhole Intervals button to enter or edit Stemming and Charge interval lengths for a selected hole. |
|
|
Click the Charge Exclusion Zones button to use a wireframe or polygon to automatically apply charge or stemming to the drillholes of a selected ring, or to the drillholes of all the rings along a selected drive. |
|
|
As an alternative to setting up charging and stemming parameters interactively, you can click the Calculate Charging & Stemming button to setup the parameters in a form. See: Calculate Charging and Stemming. |
|
|
Click the Charge Energy Distribution button to generate a charge energy distribution grid. See: Charge Energy Distribution |
|
|
Click the Set View Orthogonal button to change the orientation of the display so that it is orthogonal to the selected ring plane. This is particularly useful when you want to reset the display in Ring Design - Edit mode. When you edit a ring, the display must always be orthogonal. to the selected ring plane. |
|
|
Click the Update Drive Wireframe button to update the profile on a drive, See: Update Drive Wireframe |
|
|
Click the Export Drive Wireframe button to save a selected drive as a wireframe. See: Export Drive Wireframe |
|
|
Select the Export to IREDES button to export a Ring Design Database to an IREDES file. You can choose to export a subset of the rings in the database, export drive strings, and export the stope outline. See: Export to IREDES |
|
|
Click the Generate Ring Plot button to open the Ring Plot dialog. You can use this dialog to create multiple plots of the rings in your design. Note that the Ring Plot function does not rely on the Plot Editor as it did in previous versions. See: Create a Ring Plot |
|
|
Click the Ring Design Options button to view or edit ring design input and display options. |


Save your changes
You must explicitly save any changes you make to the objects in the Ring Design layer. This applies when you edit rings, drillholes, and ring boundaries. If you do not save your changes, you will be prompted to do so when you either close the display layer, exit Vizex, or exit the application.